Search This Blog

Sunday, July 31, 2011

Bulkhead Installed

Big day today, at least for me, as the bulkhead is now installed on the chassis. Bolts won't be tightened up until more of the body is installed, as I know adjusting everything to line up correctly will take some work. With the new footwells and door pillars, not to mention a new chassis, things won't fit exactly as they did before, in any case.

In this view: We have lift-off! Extra care was taken to make sure the new paint wasn't damaged by the lifting straps.

Blocks of wood were placed on the chassis, so that the brake lines wouldn't be crushed or damaged if the bulkhead came down on them.

In place. Still some minor work to do, namely drilling the holes for the rivets that hold on the door sealing rubber, and then the last areas of the door pillars will be painted.

A badly lit photo, but just something to show the engine-side of things. Everything lines up pretty well at this point, but steering, tub and doors must be in place before bolts can be tightened and shims placed where needed. Now, with the bulkhead gone from the floor, there will be better space in which to work on the tub, which will be the next big step.

Saturday, July 30, 2011

Painting

It's been too hot and humid to do much in the garage, but there have been some cooler days in the last little while, and so have been painting more of the smaller Pastel Green parts...plus the bulkhead. Sanding the primer took a long time, as there are a lot of surfaces there! However, last night and today it was finally cool enough to apply paint to the bulkhead - the first time it's been rust-free and entirely back in its original colour in well over 30 years.

In case you're wondering, the square hole on the top of the passenger-side footwell is for the Kodiak Mk.II heater.

As I can't use the outside to work, everything is in the garage. This makes things a little crowded, but actually quite manageable. At least it's a two-car garage! Everything not being worked on at this stage has a plastic cover, due to the paint spraying.

Friday, July 22, 2011

Paint: Pastel Green

It's been very hot and humid, with temperatures above 35 C in the garage and a humidex equivalent of arount 44 C, and so haven't done much since the bulkhead arrived. Did a little work on the tub, but the sweat running into my eyes cut that short. However, have had the paint mixed for painting all the parts that will be Pastel Green.

Using the pristine original areas of the paintwork available, I went to NAPA to see if they could scan the samples and get a match. However, nothing came close enough, and so we first went through a series of existing paint chip samples to find the closest one to Pastel Green, and then John the paint specialist very methodically began modifying the existing formula until, after a lot of work, he came up with the colour that is, for all intents and purposes, an exact match for the Pastel Green that was originally on the Land Rover.

I don't know if the actual colour of Pastel Green changed over the years (or over the batches), but here is the formula that matches exactly the colour that was in use in July 1960. It does not need a clear coat for UV protection, which is in keeping with the Land Rover style. Note the final changes to the numbers:


The result is a paint that not only matches the colour, but also matches the same degree of shine found on the original paint.  A nice side benefit.

Sunday, July 17, 2011

3 Bros. Bulkhead Arrival

Today the original bulkhead arrived back. Peter and Dave happened to pick the hottest and most humid day of the summer so far (32 C) to do this, not to mention they drove all the way here (some 4 hours each way) without air conditioning! But they did it, and brought with them the very beautifully restored original bulkhead for the Land Rover. Everything I had hoped for, and more. The only downside (just kidding) is that the bulkhead has to wait another 12 days for the primer to fully cure, before it can be painted!

In this view, Dave contemplates how to move the original chassis up onto the trailer, while other Land Rover parts lie around the garden. It's probably the only time there will be two useable bulkheads here! Ashtree bulkhead rests in the grass, while the 3 Bros. restored original can be seen in the background.

Dave and Peter rigged a small axle to the rear springs, which made pushing onto the trailer extremely easy.

Peter (left) and Dave secure the chassis and Ashtree bulkhead to the trailer. A little sad to see the old chassis go, but very good to have the extra space in the garage plus to know that the chassis will most likely go on to give life to another old Land Rover.

The interior of the tub sees direct sunlight for probably the first time in many years. Note the original insulation on the front of the tub, which will stay (although it will be made to look better).

A nice lawn ornament!

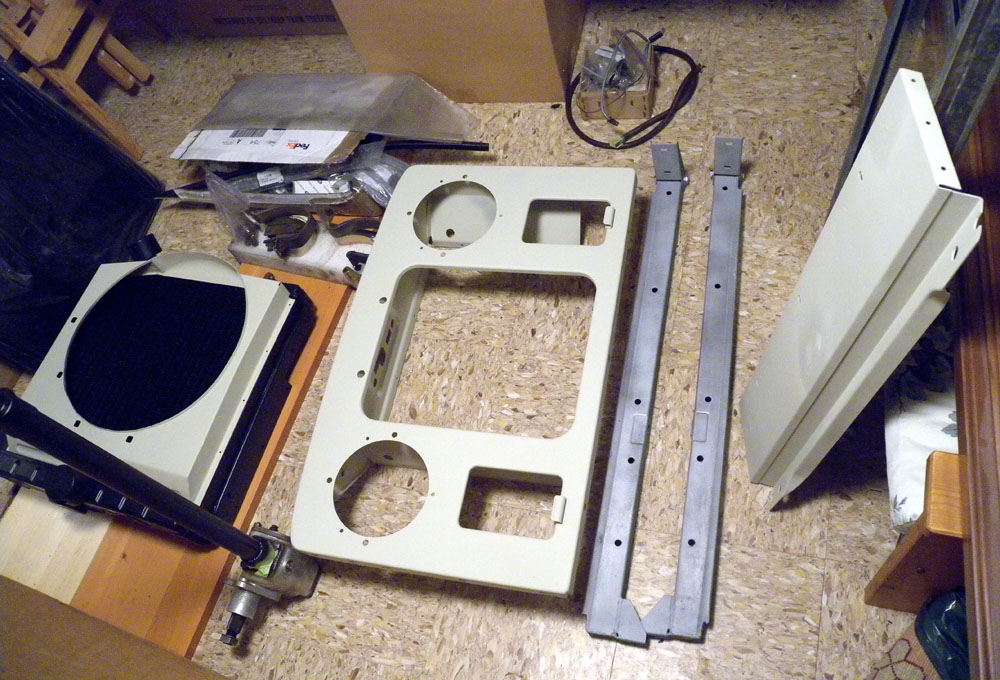
The newly arrived bulkhead indoors. Aside from a couple of holes to be drilled in the new footwells, it's just a pleasure to have the original bulkhead with all the original holes - exactly where they should be, of course!

And finally a look at the garage now. Still a bit tight for space, but easy to move the roof, tub, etc. now that the old chassis is gone.

Thursday, July 14, 2011

Bulkhead Restoration Update

A brief first view of the original bulkhead with completed metalwork, as it undergoes restoration, seen here after acid dipping to remove all traces of rust. Although the photo is just a quick phone-photo, it's still hard to believe this is the bulkhead that left here.


Monday, July 11, 2011

...And More

Spent my free time this weekend taking the pedal units apart. Also took apart the master cylinders, as they not only need inspecting but will require new seals in any case as the brake and clutch systems will be using silicone brake fluid.

The view below shows the pedal boxes at top, then the Girling clutch master cylinder parts, followed by the brake fluid can mounting bracket parts, then the Girling brake master cylinder parts, followed at bottom by one of the pedals.

The gold-coloured clutch master cylinder is a fairly new unit compared to the rest, having been replaced approximately ten years ago. The piston wouldn't come out, but after some handy advice from those in the know at the S2C, a few good hits with a rubber mallet solved that. The only other problem was that one of the pedal shafts wouldn't budge from the pedal box, even after a couple of days soak in penetrating fluid and use of a shift. However, a little pursuasion from the 12 ton press soon cured that. The master cylinder bores in both units look to be ok, but the brake master cylinder bore may receive a honing just because of its age.


Incidentally, the old chassis is still being used as an impromptu work bench, as can be seen. If you have a look at the cross member at upper right, you can see where some de-rusting fluid was spilled and took the rust off! 

Saturday, July 9, 2011

Small Parts

Have been working on a myriad of small parts while waiting for the bulkhead to show up. Have finally restored all the steering brackets and horn brackets, etc.. Once the bulkhead is back and painted, it'll be fun to start re-installing things.

In these views, just a few of the parts in the storage area waiting for their next steps. Beige/white and blue-grey parts are primed and ready for top coat. The rest are ready to go on. The green plate near the top of the first photo is a blanking plate for the passenger footwell, in it's original Pastel Green. The two washers nearby are also in original colour. Anything in it's original colour that isn't too damaged will keep it's factory paint - as long as it's not too far off whatever shade of Pastel Green gets mixed for the rest of the vehicle.

Tuesday, July 5, 2011

Hand Throttle

Simple but effective hand throttle. Very easy to clean, strip and paint. The grey body colour came off in a soaking of Evapo-Rust, not because of any rust, but I think because the coating on the body (zinc?) had developed an oxidized layer which had already separated the paint somewhat.

In this view, the unit after a night in Evapo-Rust to remove corrosion on the bolts, etc.. A very light brushing with a brass wire wheel and sandpaper, barely touching the surface, took off the grey paint plus the black on the other parts.

The undersides. The black paint on the arm, rod, etc, really just peeled off after the soaking, except for a couple of spots.

After further stripping and application of paint. The body was given a self etch primer, to hopefully prevent future lifting of paint. The 'face', from which the handle protrudes, was given a very light overspray of zinc paint on its outer surface only, which looks a lot like the original coating and may, according to some sources, help prevent future corrosion in the same way that galvanizing does.


A pretty simple unit, but it does the job and is definitely built to last!