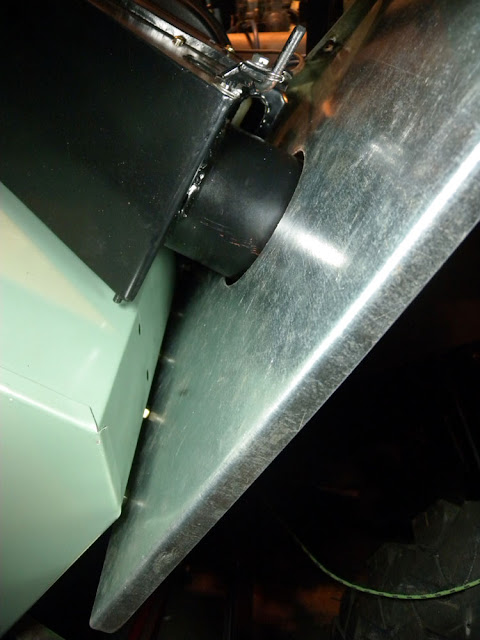
One major part done today, and that's the mudguard with the hole in it for the heater duct. First scraped a deep groove using a special tool, and then patiently drilled holes all around, followed by snipping with my shears. Cutting steel that is almost 1/16" thick with hand shears will improve your handshake. : )
In this view, the mudguard test fitted, with the hole cut and Kodiak intake poking through. The bottom of the mudguard has been moved away from the footwell with an extra nut, as I have heard from several sources that dirt and moisture collected at the contact area is one of the primary starters of rust on a Land Rover bulkhead. The extra space will let the area drain. The duct hole will probably let in extra dirt, etc., too. A side benefit of the extra nut is that the mudguard can be removed without having to have something/someone hold the bolt inside the footwell.
View from the other side. Aso had to modify the flanges at right to fit correctly within the wing. Mudguard can now be painted.
The tools that did the job. The resulting piece of mudguard looks like a saw blade, and is probably as sharp. A file was used to smooth the hole.
Duct being test fitted. Some sort of edge protector will be needed around the hole to prevent wear on the duct. Bolt with large washer at upper right is one of the mounting points for the duct supports, which have yet to be made.
Did a very loose test fitting of the outer wing, just to make sure there were no clearance issues with the mudguard.
And while the wing is on, why not a shot of the overall project, as it is now? : ) The hood/bonnet is leaning against the back, and the roof is out of sight to the right. In a way it's too bad about the wrinkled rear panel, but hey, at least I'll have a Land Rover to drive! And the rear panel shouldn't stand out too badly once all is done, as evidenced by the bottom-most photo, which is of the Land Rover as she was when newly arrived.
Front panels, sills, etc., looked a lot worse back then...not to mention everything else underneath that Birmabright skin. Rear panel has actually been straightened quite a bit since then, as has the rear corner capping.


No comments:
Post a Comment