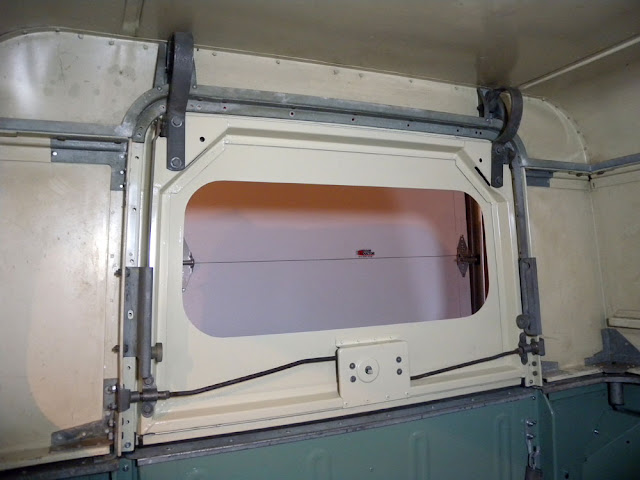
It took me a while to figure out how to bend the hinge brackets, as they are very thick. Finally, however, they were done with the help of a long pipe wrench and a firmly anchored shop vice. It took a lot of adjusting and many trips back to the vice.
The damage also meant re-riveting the galvanized brackets into which the hinge brackets fit. No damage there to the parts themselves, just pulled and sheared rivets which had to be replaced.
Below, the final result (which also makes me realise the original paint on the interior needs better cleaning...). No inner door handle yet, as the mystery of how the parts get assembled still needs to be resolved. Window and seals also need installing.
Overall Land Rover still wearing the plastic used for protection when painting the lift gate. It'll stay on a while longer, as work begins on the interior headliner.
More damage than you might think. The latch handle had been pulled off, too, dragging the bolts through the skin.
Headliner. Very dirty, but still in pretty good shape. The metal frame is rusted, but should last for a while, and won't be the end of the world if it needs to be re-made. Thread and seams are in excellent shape. I had thought about having the local upholstery shop redo the fabric, but I think a good cleaning and a coating of specially formulated paint for vinyl will work, and is in keeping with efforts to keep everything original where possible.


Hi Michael
ReplyDeleteI’m Max. I’m restoring a 1960 88 as yours. Same colour too! I’ve just bought it and I’m working to fit the brakes now; but the car needs a total restoration.
First of all my compliments for the job you are doing.
Speacking about the tailgate layout, I would like to send you a picture of the rear tailgate of my Land with the handle and the stay bar fitted. The stay bar have to be fasted on that rounded pin fitted on the side of the top when the tailgate is open. When it is closed the stay bar have to be fitted on the clip just below the window (my clip is broken).
I saw your tailgate hasn't the bracket for the stay bar fitted.
Sorry for my English, but I hope this information could be useful.
I have not practice with the blog, so I don't know how to send you the picture. If you want write me to mpichi@studiotributariopichi.it ad I'll reply with the picture attached.
Have a nice time.
Max
Rome, Italy
Hi Max,
ReplyDeleteI know the kind of stay bar support you are speaking of. Mine has a different type of support, with the two sliding bars that can be locked.
I'd certainly like to see your 1960, and I'll contact you. If you are going to do a restoration, I hope you start a blog, as there is never enough information out there!
Ciao, Mike
Hi Mike
ReplyDeletenice to hear from you.
Mine tailgate has the lockable sliding bars with the inner handle as your, plus the stay bar for keeping the tailgate in the open position.
I've noted the green type you use on the contact surfaces of the aluminium panels. Is for help to block the electrolytic corrosion, or what else?
Ciao Michele
Max