Search This Blog

Tuesday, September 18, 2012

'Eyebrow' Headliners

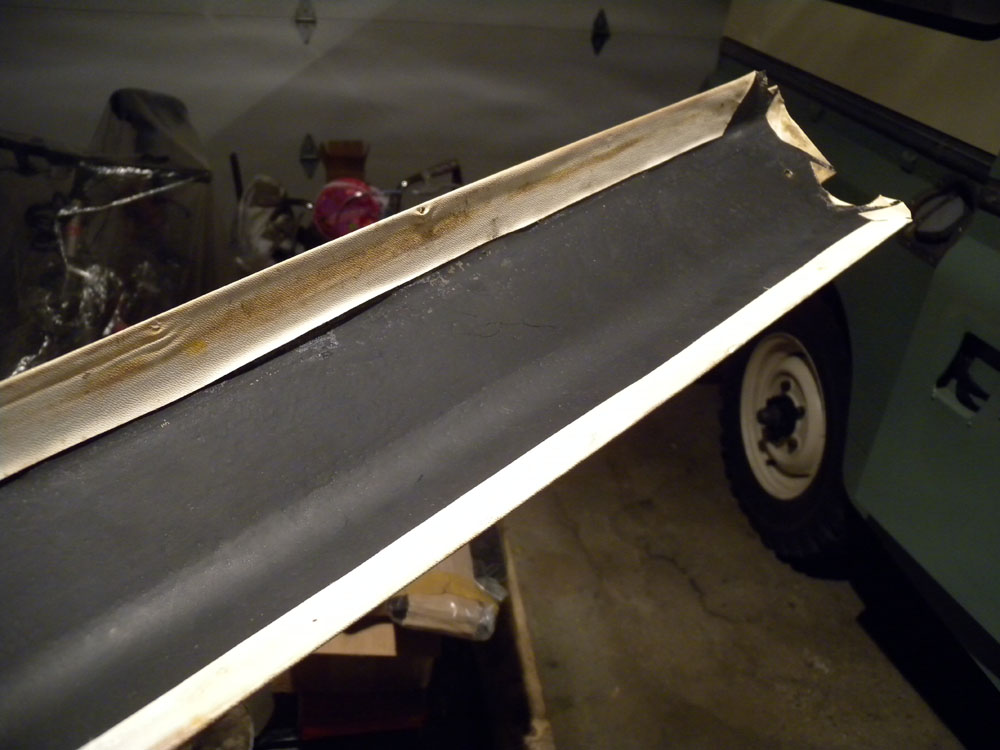
Finally got around to doing the 'eyebrow' headliners. These are steel stamped plates covered with glued-on fabric-backed vinyl. The steel had become heavily surface-rusted and this had pushed off and to some degree distorted the vinyl surface. The glue itself hadn't survived particularly well, either. The vinyl came off just by pulling up the fold-over sections. The vinyl itself had survived pretty well for it's age, however, although the small bumps from the rust, and other distortions formed around screw holes and places where the headliner touched the body, were impossible to get rid of. The fold-around edge locations were definitely there to stay, but this helped to put the vinyl back on exactly as it was originally.


 Below, the basic steel forms, de-rusted and painted with a rust-paint.
 
 
The vinyl glued back on, using 3M's High-Tack Spray Adhesive. The vinyl insisted on keeping most of it's original shape, and to counter this the internal edges were taped down after painting to prevent slow curling and hopefully eliminate future delamination. The cut of the vinyl is factory original; that's how it looked originally. Not pretty, but it did the job.
 
Test fit of both headliner halves. That is not their original colour - they were white, as was clearly shown by the areas that had remained hidden. That's just 50 years of dirt, possibly combined with cigarette smoke, who knows.


Finally painted the halves with the excellent paint for vinyl used for the roof headliner.

Just an after and before view. Note how screw holes and top edges do not lign up. Welcome to quality control, 1960-style.

All three original headliners, roof and eyebrow, installed with their original vinyl. Very happy to have been able to keep them.


Friday, September 7, 2012

Door Seal Rivets

The by-the-foot rubber door seals that were installed have been peeling off, in spite of using very good quality 3M glue. I spoke to Peter Baker at 3 Bros.and he kindly sent over a complete kit of new door seals for the Land Rover, the purpose-made ones with metal strip inserts, the kit including the correct tubular rivets and the loan of a top-of-the-line river squeezer. A really nice quality kit. Unfortunately the peculiarities of this vehicle (factory body assembly left a lot to be desired, but was kept as it's authentic to this vehicle) meant that these new seals can't really be used, as the doors will not close. Instead, after some experimentation and testing, there appears to be a way to use the tubular rivets on the by-the-foot rubber door seals. This method works well, and keeps the authentic look inside the cab.

Below: finished results, from inside the cab, at rear of door. No more holes, just nice new aluminum rivet heads.


In the plastic bag, the rivets as supplied by 3 Brothers Classic Rovers. A box of 3/16" aluminum backing plates were purchased elsewhere, to serve as the metal support plates inside the rubber door seal.


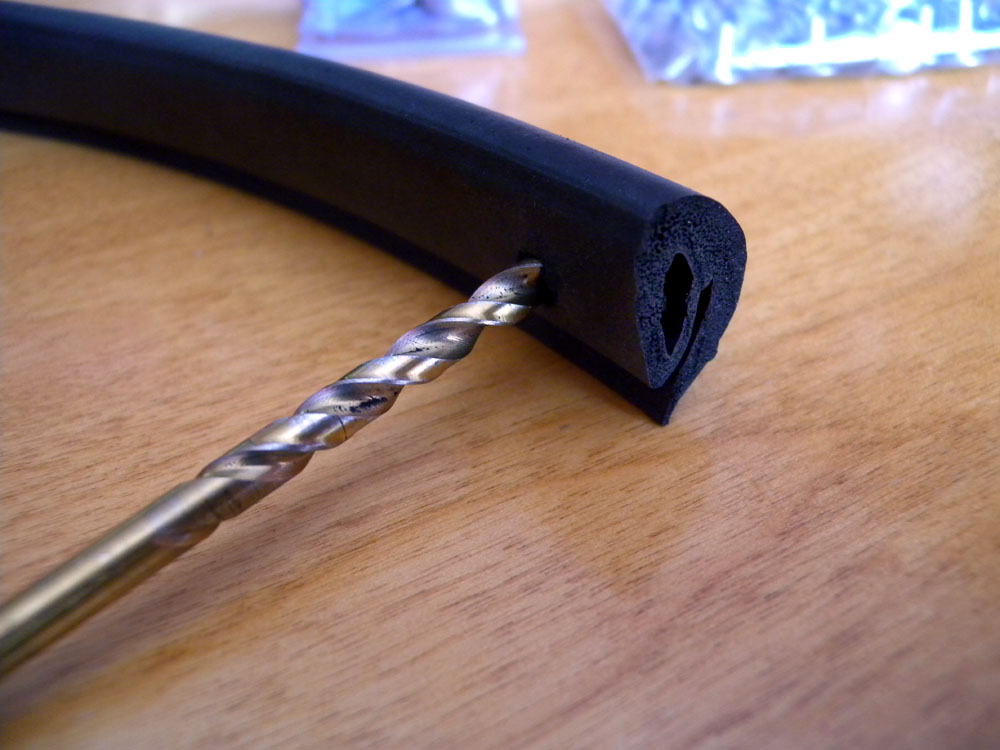
First step, drill a 3/16" hole into the rubber seal from the inside surface, going only through the first two layers (out of three). Don't drill through the outer curved part. Keep the drill turning quickly so that the rubber doesn't bind to the bit.


Secondly, use a pair of needle-nose pliars to slide a backing plate into the hole. The rubber is quite stretchy, and will allow the backing plate in and then essentially close up afterwards.
Third step, center the backing plate within the seal using an awl or whatever serves the purpose. The rubber will keep the backing plate in position once it's where it needs to be.

The next step is done on the Land Rover - just doing it here for illustration. Push the rivet through the hole in the door seal flange on the Land Rover, then through the seal and backing plate. Then the tubular rivet can be squeezed very easily. The rivet squeezer means the pressure on the river can be modulated to be just tight enough to hold the seal, without flattening the inner surface of the seal too much and thus distorting the  seal, as usually happens with pop rivets. 

That's all! : )


Wednesday, September 5, 2012

Long Short Drive.

On a nice day between two rainy ones, took the dog for a short drive after work. If you've twelve minutes to spare, or want to see what it's like driving a Land Rover, or are just having trouble falling asleep, come along for the drive. : )

Monday, September 3, 2012

Self Cancelling Vacuum Indicator Switch

Installed the new indicator switch today. The original still worked, but the vacuum element was broken, and so had to be turned off manually. This meant that, often enough, I'd forget to turn it off as the switch is not readily in view. The new switch was ordererd from Holden UK, here, and arrived quickly and was well packed. Quite a pricey unit, but as they are difficult to find and a working switch was needed, so be it.

I thought it would be just a matter of a few minutes to install, but the old Land Rover motto (at least for me) "what you think will be easy will in fact be difficult, and vice versa" came into play.

First, though, the new part is almost identical in appearance to the original. The original has the name Lucas on the back, the new simply has the made in UK info, but the body is the same bakelite-type material. The differences:

- The original had a galvanized large lock washer, the new appears to be simply plated.
- The screw-on ring of the new is not of the same quality as the original, but the original can be used on the new switch (as with the original lock washer).
- The openings on the lock-screws on the rear face inwards, whereas on the original they face outwards.

The problem area: the new unit didn't fit through the original hole in the auxiliary panel. And so the wires had to be undone again, and a file used to take off the required amount (approx 1mm from each 'flat' side of the threaded mount) from the switch body. The bakelite is somewhat fragile, and the filing caused some chipping, but only a very small amount. The filing also curled material into the threads, and so they had to be cleaned afterwards. Not a big problem overall, but still unexpected.

The new unit works perfectly, and it's nice to see the turn signals go off automatically. The only other area of potential concern is that it now takes a lot more effort to turn the signal switch lever itself, and I'm a bit worried the old plastic lever will not take the strain for too long. However, that remains to be seen, and new switch levers are available - but not in the original white, unfortunately.

Below, the original on the left, the new on the right.

Thursday, August 30, 2012

Night Drive

It occurred to me that the Land Rover hasn't been driven at night since the basic restoration was completed. And so, this evening, took the Land Rover out in the dark, along country roads and then a second drive a while later, up the faster main road for a mile or two.

Nice to dicover that the headlights are really good, and do an excellent job, both in low and high beam. Instrument panel lights do their job equally well. A very enjoyable set of evening drives - the only worry being deer crossing the roads on the dark stretches.

Since it's first test drive on January 9 this year, the Land Rover has now done 727 kilometers. Most of those kilometers have been done since April.

Sunday, August 26, 2012

Carter's Birthday

Carter being the son of Steve and Nicole. Steve being the technician/mechanic/restorer who came down last winter to ensure that I had done a good job restoring the Land Rover. The Land Rover being what took us up to Steve and Nicole's today for Carter's birthday party.

Below, about ready to go, GPS on the windshield (it's my km/h speedometer), car seat for my daughter installed, and a yellow sticky with directions. Yellow sticky plus a GPS? Yup, the yellow sticky us easier to read at a glance in the bright light outdoors.

An hour's drive later, parked at Steve's, between a Mini and Jim's Jag. A hot drive up, as even with the window vents and windows open, a lot of heat is transferred into the cabin. This not helped by having the Kodiak heater on, as it helps to bring the coolant temp down in the hot humid conditions. Although it's possible to direct the Kodiak's outflow, enough hot air escapes around the baffles in the box to keep your feet warm. Nice in cold temperatures!

Just a further view, with a Porche 911 under wraps. Yes, Steve does those, too. Steve's old workshop in the foreground, and new top-of-the-line facility in the background.

The gathering. Why there is a yellow car jack stand in the middle of the lawn, I do not know, but I'm sure there's a good reason. Thank you, Nicole and Steve, for a very enjoyable afternoon.

Getting ready to come home. Actually a very comfortable vehicle to ride in. A bit slow on faster roads, but then, I just pull over to let the traffic go by and it's not a problem. Aside from being a little warm inside, and being a little slow at times, it really is nice vehicle to drive. Next summer, however, it may be nice to take the roof off, or even perhaps try a canvas roof that can have the sides rolled up.

Sunday, August 19, 2012

British Cars in the Park

Another annual Boot'n Bonnet club day, this time "British Cars in the Park" in City Park in central Kingston. Beautiful weather, and a truly great assortment of British makes and models on display, and many public visitors.


Some even found the Land Rover attractive. : )

Nice ambience.

Not the only Land Rover there - there was also a Defender, the modern version of the old design.

Steve at Classic Automotive Repair brought a display of his always excellent restoration work.

I wrote a short blurb about the history of the Land Rover, and placed it between the sliding windows of the doors. Seems to have been a good idea, lots of people took a second look around the vehicle after reading it.  In the MG on the left, you can make out a mask in the driver's seat portraying Queen Elizabeth II. : )

The blurb:


The Boot'n Bonnet club tent and registration area. Lunch was provided. We won a raffle ticket draw (small bag for carrying drinks and the like). Generally a very nice day and a good time had by all.