Search This Blog

Wednesday, March 23, 2011

Bulkhead Ready to Come Off.

Finished stripping the old bulkhead tonight, and it's now being held in place just by the two main bolts (nuts are off), and is leaning against the one remaining support bracket. It will be off soon.


Just a few of the things liberated from behind the instrument panels. Nothing of value unfortunately!

How many holes are there in a bulkhead? Well, once everything is off, it turns out there are quite a few. Apologies for the blurry photo, but is was dark.

After 51 years of service, the old nut locking plates on the swivel hub control arms were finally replaced with the new ones, and that's that done.


 A view of the front end, about to receive the brakes; then the hubs will be installed along with the drums.

Monday, March 21, 2011

Stripping Old Bulkhead Continues

Continued taking items off of the old bulkhead this evening, tonight being the turn of the steering column and box, along with the accelerator pedal and linkages.

A couple of  views of the round junction box:


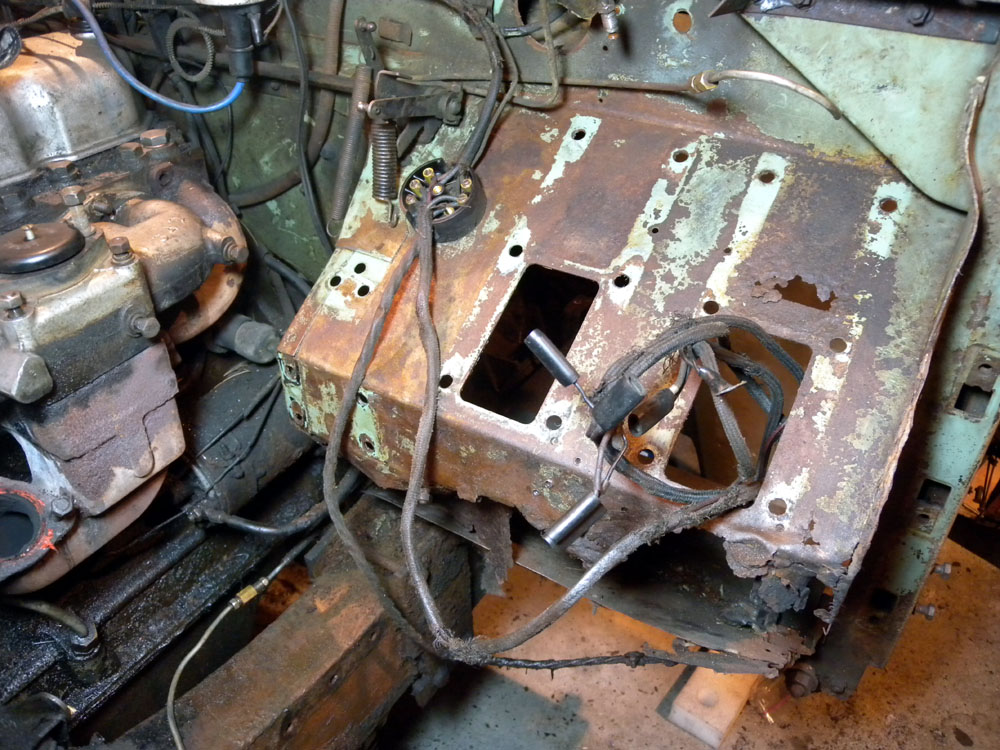
An overall view of things as they stand now. Remains of the old electrical loom may stay until the new bulkhead is installed and wired up, as the new loom that will be installed does not have the wires for the turn signals, and I'll need to know how to hook them up.

Engine looking a little more exposed. At lower left is what I believe is the original single pulley for the generator, which was removed so that a double could also power the hydraulic snowplow arm. It was wedged between the bulkhead and chassis, at lower right. Tried to get the exhaust and inlet manifolds off tonight, but each has one very seized/rust corroded bolt in a very awkward spot that will take some thought. Note the gooseneck exhaust manifold, which will be replaced with a standard later version, as it goes straight down and will match up with the new exhaust pipes. Would like to get the engine off soon.

A quick view of the auxiliary panel and the hand throttle. I have a replacement starter button, so I hope the original doesn't turn up somewhere! The two rusty items protruding downwards are actually large nails trapped in the bulkhead. Wouldn't want to have swung a foot or knee up onto those. They'll come out when the bullets come out. The black goop on the bulkhead is the adhesive for the insulation that used to be there.

Sunday, March 20, 2011

Steering Parts; Instruments

Thanks to a tip from a gentleman and fellow Series 2 restorer named Lars, the top steering arm bolt on the steering relay has now been reversed - as Lars discovered, in this direction it's easier to remove the bolt in the direction of the 'breakfast', if necessary. No radiator in the way. On RHD cars the bolts is the way it was originally (and would have drawn out towards the front), but when making a LHD vehicle, the factory just turned the unit around as they moved the relay from one side of the chassis to the other.

As the new bulkhead is getting closer, tonight it was the turn of some of the steering coumn parts to come off the old bulkhead for their turn at restoration. Note the condition of the rubber seal for the steering column - the exposed portion hasn't stood the test of time too well! A nice new replacement is waiting....


The steering column itself, including the steering box, is next on the list. All the bolts are loosened, but ran out of time tonight.

Just a couple more views of the rear of the main instrument panel. Nice untouched Pastel Green paint back there, as well.

Saturday, March 19, 2011

Test Fitting Steering Rods

Having the swivels basically finished, just thought I'd try out the steering rods for size, to make sure everything still fits without a problem. All's well, but one of the ball joints/rod ends spun in its socket when trying to tighten the nut, maing it impossible, and so it looks as is they may need replacing. Also, the dimensions I have for the rod lengths doesn't appear accurate at first glance, as putting the rod ends at the indicated distance apart gave a pronounced toe-in. Could it be a Series 2 versus Series 2a thing? Will have to check on this.

View below shows the completed swivel housings, with the interior of the brake backing plates painted in that stainless-steel based brake fluid resistant paint. Not completely sure it's necessary, but thought I'd try it out. Certainly has a nice finish. The locking plates were slightly too long, so are bowed in the middle, but that's not really an issue. The tabs will be folded around the nuts once I'm confident all's well and the nuts will not need any further tightening.

Here's a view of the steering relay, once again installed. Note the different surface textures on the chassis, some due to the nature of the surface of a particular piece of metal used to make the chassis (such as the cross member the steering relay is on), but mostly due to the galvanizing, which left little lumps and surface irregularites over most of the surfaces.

Thursday, March 17, 2011

Swivel Balls; Instruments

Finally have the swivel balls installed, but ran out of time to do the rest of the hubs. Will get to that soon. It'll be nice to have the front axles done, as it will mean a rolling chassis isn't too far away.

Have pulled away the instrument panels, preparatory to taking them out - but first I will take many more photos to aid re-installing. Here, the somewhat chaotic wiring of the main instrument cluster.

This view is of the turn signal and dome light auxiliary panel. At left is the switch housing, in the middle is the indicator light, and at right is the pull-knob switch for the dome light. Judging by the condition of the terminals, I doubt a dome light has ever been connected.

Here's the auxiliary panel for the oil pressure and water temperature gauge, which can't be removed unless it's unbolted from the bulkhead plus has the input leads disconnected - which I'll do later. And what is that extra thing with a light bulb at the end?

Here's a view of the bottom of the oil instrument auxiliay panel. In there was the red knob for the high/low ratio lever (had already bought a replacement, of course!), plus an assortment of bolts and debris plus a good many bullets and casings. Will be removing those with great care.

Thursday, March 10, 2011

Pedals Out

To do something a little different today, the clutch and brake pedals were removed, along with the "bean can" brake fluid reservoir. This also afforded a little better view of the rust around this area. Interesting to compare the pedal openings with those on the new galvanized chassis. Aside from the bulkhead, though, everything else is in pretty good shape aside from surface rust and dirt.

Not too much left here! The accelerator pedal will come one next, but only after I carefully photograph all the linkages, etc.. The black substance on the bulkhead is the remains of the glue that held on the original insulation. The strait-edged sheet metal at bottom is just something the previous owner had put to stop his feet going all the way through....

Wednesday, March 9, 2011

Axle Work

With the differentials complete, they've been attached to their respective axle casings, and the casings are now attached to the springs. The rear axle just needs its hubs and brakes, while work should begin soon reassembling the swivel hubs at the front.

In this view, it's just about possible to note that the insides of the brake backing plate has been painted with Eastwood's brake fluid-resistant paint, which is stainless steel based (and silver in colour).

Ready for the swivel hubs: